Today, memory cards are used in all devices and make it easy to transfer files between computers. But before using the memory card, you must convert it to a format compatible with your system. Although most memory cards come pre-formatted, formatting them before use can improve performance and is an easy way to clean up an old memory card. Read this article to learn how to format a memory card.
Using SD Format Tool
Learn the difference between formatting and deleting data. During the process of formatting a memory card, all data will be deleted, but the formatting process is not simply about selecting all the data and then deleting it. It also includes setting file types, optimizing your memory card to run better on special devices, and more. Simply deleting data often leaves a lot of useless fragments, affecting the capacity and performance of the memory card. Therefore, when you want to get better use of your memory card in a new device, we recommend you format the memory card instead of deleting existing data.
Download the SD format tool. This tool is a free format tool developed by the SD Association and is often recommended for formatting SD, SDHC, and SDXC cards. This program has a wide range of applications and is compatible with various versions of Windows systems and Mac OS X systems. Compared with the formatting tool that comes with the operating system, using the SD formatting tool can significantly improve the performance of the SD card.
- Read and accept the terms and conditions listed on the SDCard.org website to begin downloading the formatting tool.
- Only formatting tools downloaded from the SDCard.org website are trusted and safe.
Unzip the installation package. If you are using the Windows program, you will need to unzip the ZIP file before installation. Double-click the XIP file, then copy the “setup” file to your computer desktop, then double-click the setup file to run it. If the computer you are using is a Mac system, then simply double-click the PKG file.
- You may need to enter your administrator password to start the installation process.
- Unless there are special circumstances, most users can keep the default installation options.
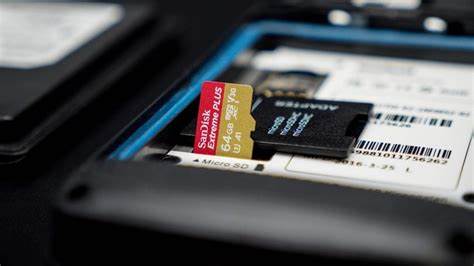
Insert your SD card. Insert your SD card into the SD card slot of your computer, or connect it to your computer via an external SD card reader. After inserting the SD card, the operating system will automatically recognize the memory card.
- Make sure the memory card’s write-protect lock is turned off. Check out the specific guide to learn how to fix a broken lock.
- If you inserted an SDXC card and a message appears on the system prompting you to format the card after inserting the card, remember not to accept the prompt in this case. If you accidentally use your operating system’s formatting tool, the card will no longer be in SDXC format.
- You may need to download the SDXC driver for Windows Vista or 7 systems. You can download the corresponding driver from the “About SDXC/microSDXC” section of the SDCard.org web page. Not all SD slots support SDXC cards. At the same time, not all upgraded versions of SD drivers support SDXC cards.
Back up the data you want to save. Formatting your memory card will delete all data on the card. Therefore, if you want to save some data, you need to back up the pictures, files and other data on the card to other paths before formatting.
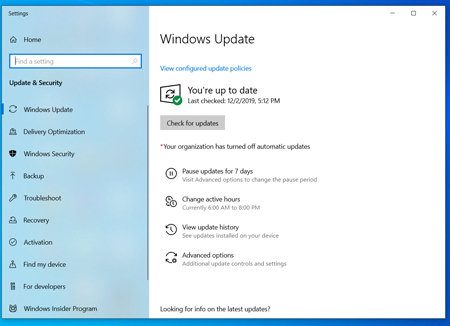
Open the SD format tool. After inserting the card, you can open the SD format tool to start the formatting process. Select your memory card from the driver’s drop-down menu to format it. If the memory card is not in the menu, you can click the refresh button.
Adjust formatting options. Click the Format Options button to perform basic formatting settings. Most users can keep the default options, but if you don’t want others to retrieve your data, you can set the FORMAT TYPE option to FULL (overwrite).
- In the Mac OS X version of the formatting tool, these options are set in the main window because there is no formatting option button.
Name the memory card. When you insert the memory card into your computer, you can name the SD card by entering a name in the disk label that appears. This helps you identify the memory card and helps you remember the data contained on the memory card.
Verify memory card capacity. The memory card capacity is displayed in the memory card capacity section. Generally, the actual capacity of a memory card is slightly less than the capacity marked on its packaging. This is because both the capacity storage calculation algorithm and the formatted file system will occupy some space.
Start formatting the memory card. Click the Format button to start the formatting process. Depending on the similarities and differences in the formatting options and the size of the memory card space, the entire formatting process may take a while. You can monitor the entire process in the window that appears next.
- Do not remove the memory card during the formatting process.
Use Windows Formatting Tools
Back up the data you want to save. Formatting a memory card will delete all data on the card, so if you want to save pictures or files on the card, you need to back up the data on the card to another path before formatting.
Insert the memory card into the reader. Many laptops come with built-in memory card readers themselves, while some do not. You can purchase a memory card reader that connects to your computer’s USB port via a USB cable. The connection ports vary depending on the type of memory card, so make sure you plug in the correct port when connecting to your computer.
Turn on your device. Open Windows Explorer by pressing the Win and E keys. By default, you’ll be taken to My Computer (Windows XP)/Computer (Windows Vista or 7)/This Mac (Windows 8) showing all connected devices. If you don’t see the page, try entering the path in the left navigation bar or the address bar at the top to enter the page.
- Windows Format Tool works on all versions of Windows systems.
Right-click on your memory card. You will see the drive that came with the memory card appear in the list. When the memory card is inserted into the computer, it will appear on the screen like any other USB device (removable device) or pluggable hard drive plugged into the computer.
- Make sure you right-click on the correct memory card, otherwise you will format the other device and lose all data on it.
Select “Format”. The Format Removable Disk window will then open. You can set formatting options in this window.
- File System – This is the framework for the memory card file system. If you are using a memory card with a capacity of 32GB or less, you can use the FAT32 file system to ensure that the memory card operates properly on Windows and Mac systems. If you are using a 64GB or larger memory card, then you will need to format it as exFAT. It is worth noting that Windows Vista and XP systems themselves do not support exFAT, but if your system is in the latest version, the system does support exFAT.
- Disk Label — The disk label is the name of the memory card and can help you identify the contents of the card.
- Quick Format — Selecting the Quick Format option can help you speed up the formatting process. Unless there are special circumstances, you can select this option for quick formatting.
Start formatting. Click on the Start button to format the memory card. Depending on the size of the memory card, the entire formatting process may take some time. After formatting is complete, your memory card can be used to store or transfer file data.
Use Disk Utility
Back up all the files you want to save. Formatting a memory card will erase all data on it, so you need to make sure all files are backed up.
Insert the memory card into the card reader. Many laptops have built-in card readers, while most desktops do not. You can buy a USB or FireWire card reader and plug it into the USB port. Since many card readers have multiple card slots for different types of memory cards, you’ll want to make sure you insert the memory card into the correct card slot.
Open the tools folder. You can find it in the application folder. If your Apps folder isn’t visible, you’ll want to click Go Menu and select Apps. The tools folder is in the application folder.
Open Disk Utility. It is located in the Tools folder, double click on the icon to open it.
Select a memory card. All external storage media and hard drives will be listed in the left window of Disk Utility, select your memory card there. Make sure you make the right choices, otherwise formatting will erase other content.
Click the “Clear” tab. Before starting formatting, you can select formatting options on this page.
- Volume Format – This is the format of the memory card after it has been formatted. If you want it to work with both Windows and Mac computers, you’d better choose the FAT format. If you’re only using it on a Mac, you can select “Mac OS X Extensions.”
- Name — This is the name of the memory card. It allows you to identify your memory card so you can quickly know what’s inside.
Start formatting. Click the “Clear” button to start the formatting process. Formatting time depends on the card’s capacity. Once the process is over, you can use the memory card to save and transfer files.
Tips
- If the memory card is formatted as “FAT32”, older cameras and devices may not be able to read it properly. You need to reformat it to “FAT” format or format it using a camera or other device.
- For memory cards used in cameras, formatting them occasionally can maintain their performance.
- If you want to format a memory card in a camera, it’s best to format it using the camera rather than using a computer.